Postgres Configuration
This section covers the configuration and installation of Postgres
Overview
PostgreSQL has many different distributions including the Postgres 11 version that can be automatically installed. This document will cover the configuration of PostgreSQL 15 after it is installed windows and both the installation and configuration of Postgres 16 on Linux. Other configurations and versions of PostgreSQL will be similar. For more information on PostgreSQL documentation is available at https://www.postgresql.org .
Note: If an encrypted database connection is needed and a non-public encryption certificate is used, the keystore must be updated with an enterprise trust certificate that will authenticate the certificate of the database.
PostgreSQL Installation and Configuration Procedure on Linux
This section cover the installation of Postgres 16 for use with CenterScape on Redhat/Oracle/Rocky/Alma/Fedora type Linux distributions. Other distribution will differ on package management so using their documentation to install and configure Postgres would likely be more useful. The configuration changes recommended for the pg_hpa.conf and postgresql.conf files are likely to be relevant no matter which distribution of Linux is used.
The first step in installing Postgres is to install the binaries on the server. This is generally done through the package manager. The package manager will likely have an older version of Postgres as its default Postgres install. To view the available version of Postgres Server alternatives the following command should be issued.
#dnf module list
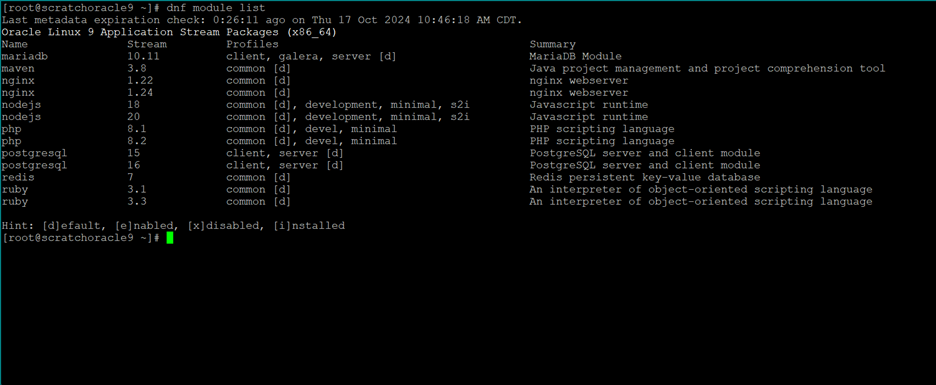
In the above example Postgres 15 and 16 is available on the Oracle 9.4 Linux application stream. To choose Postgres 16 as the version of Postgres the following command is used.
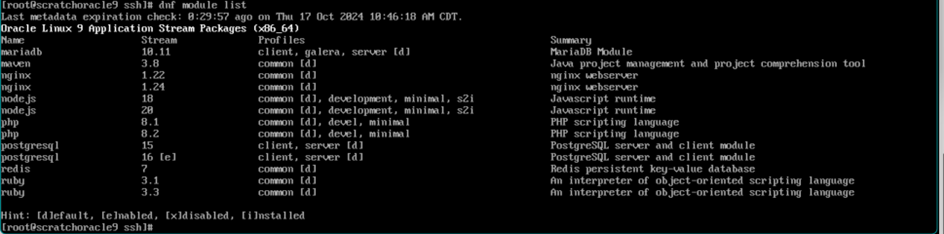
#dnf module enable posgresql:16
After the command is complete repeating the “dnf module list” command will show Postgres 16 as enabled [e]
Once Postgres 16 is the chosen version install postgresql-server and postgresql-contrib.
#dnf install postgresql-server #dnf install postgresql-contrib
Next Postgres needs to be setup and its data directory initialized.
#postgresql-setup –-initdb

The output will display where the data files have been created. In this case it is /var/lib/pgsql/data. In this directory several files will need to be edited.
Postgres Configuration Files
postgresql.conf
| Attribute | Setting | Description |
|---|---|---|
| listen_addresses | ‘*’ | For Postgres server that need to listen for connections from CenterScape running on another host. Default of ‘localhost’ is fine when postgres and CenterScape is on the same Linux host |
| shared_buffers | 2GB | Default of 128MB is for very small CS installations. |
| work_mem | 128MB | Default of 4MB is not enough for CS reporting. |
| maintenance_work_mem | 256MB | Set to double work_mem |
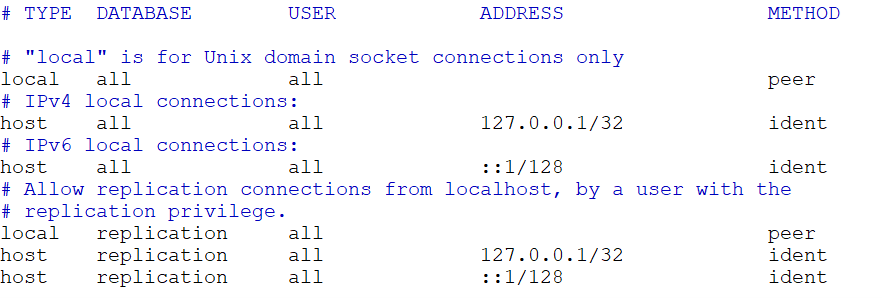
pg_hba.conf
The pg_hba.conf file defines access control to Postgres. The contents of this file and the defaults they provide can vary greatly depending on Linux distribution or repository source. The below example is the pg_hba.conf file from Postgres 16 on Oracle Linux 9.4.
Add configuration options here
If CenterScape is collocated on the same host as Postgres add the following line
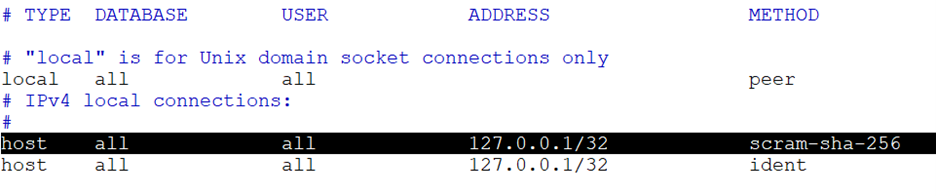
If CenterScape is on a remote server then add the following line where 192.168.250/24 is the ip/subnet of the network the Centerscape application resides.

Once these two files are configured Postgres should have the proper memory and security configuration for CenterScape. This configuration is by no means the only possible configuration for Postgres and CenterScape to function correctly. Additional options for Postgres configurations and tuning can be found in the Postgres documentation.
The following commands will enable Postgres, start postgres and setup an empty database. Replace rfcode-password with the password of choice for the rfcode role account. This will be needed by the CenterScape application server when it connects to the new database named ‘centerscape’.
#systemctl enable postgresql #systemctl start postgresql #sudo -u postgres psql -c "create role rfcode with login password 'rfcode-password'" #sudo -u postgres psql -c "create database centerscape with owner = rfcode"
PostgreSQL Configuration Procedure on Windows
Postgres can be installed on Windows using various methods including the EDG installer found on www.enterprisedb.com. This configuration procedure uses pgAdmin4 which is an application used to manage PostgreSQL via a graphical user interface. Similar actions can be taken by command line but those are covered by the previous Linux installation guide or can be found in Postgres documentation. The configuration instructions starts with a successful login as the postgres superuser using pgAdmin4 on a fresh installation of Postgres but may be adapted to other Postgres environments.
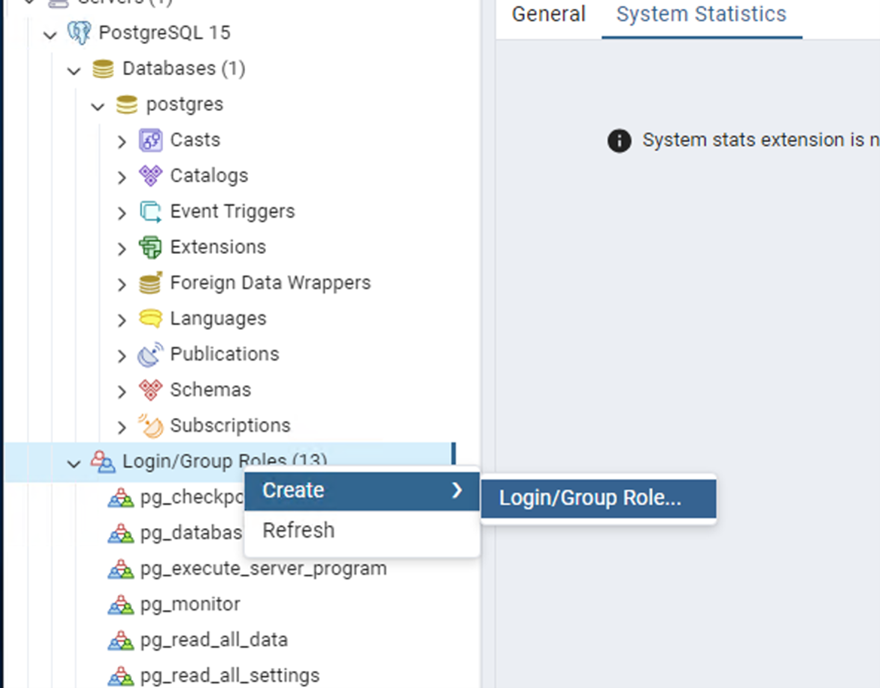
Create a new login for the CenterScape application to use.
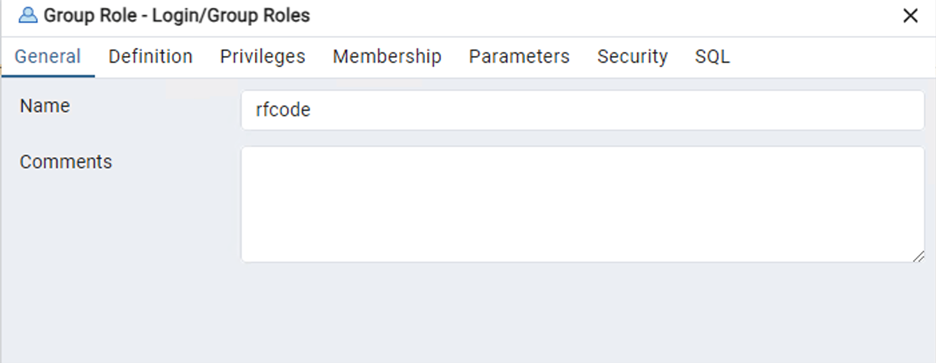
Name the Account
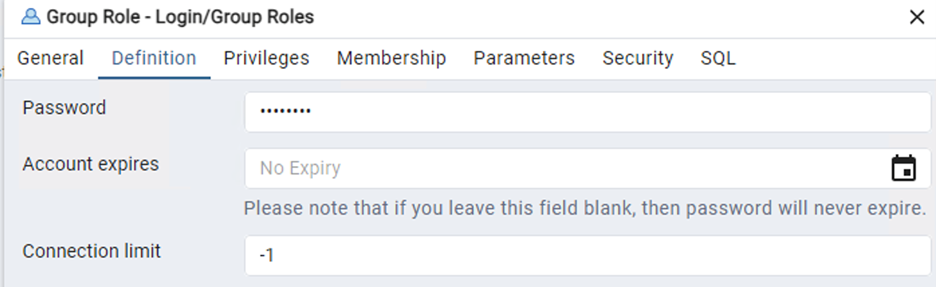
Set a password and record that password for use in CenterScape Installation.
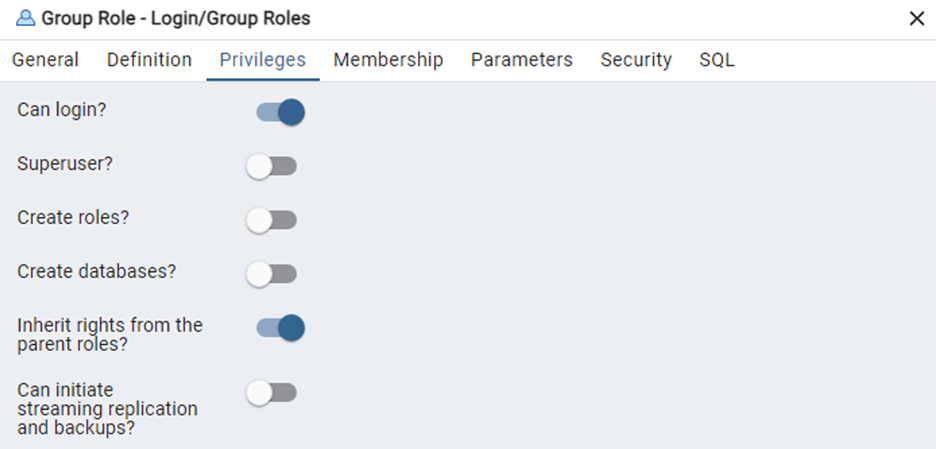
Enable “Can Login” in the privileges tab.
Save the user and create the database.
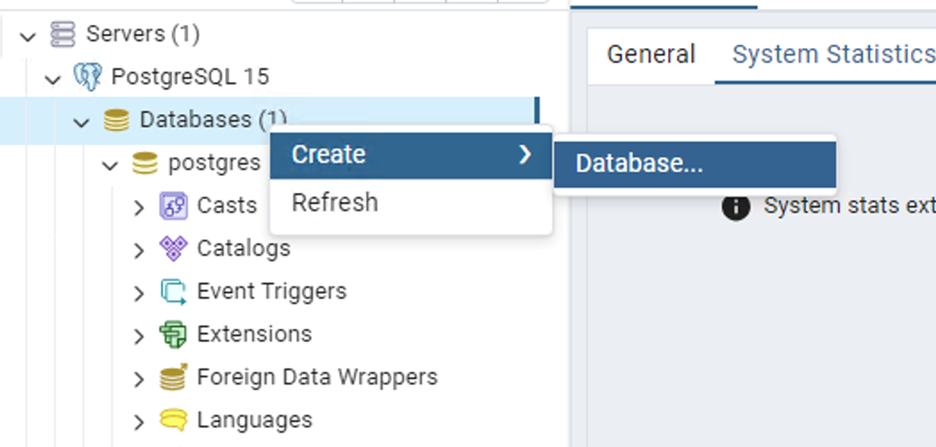
Name the database and chose the created login as Owner
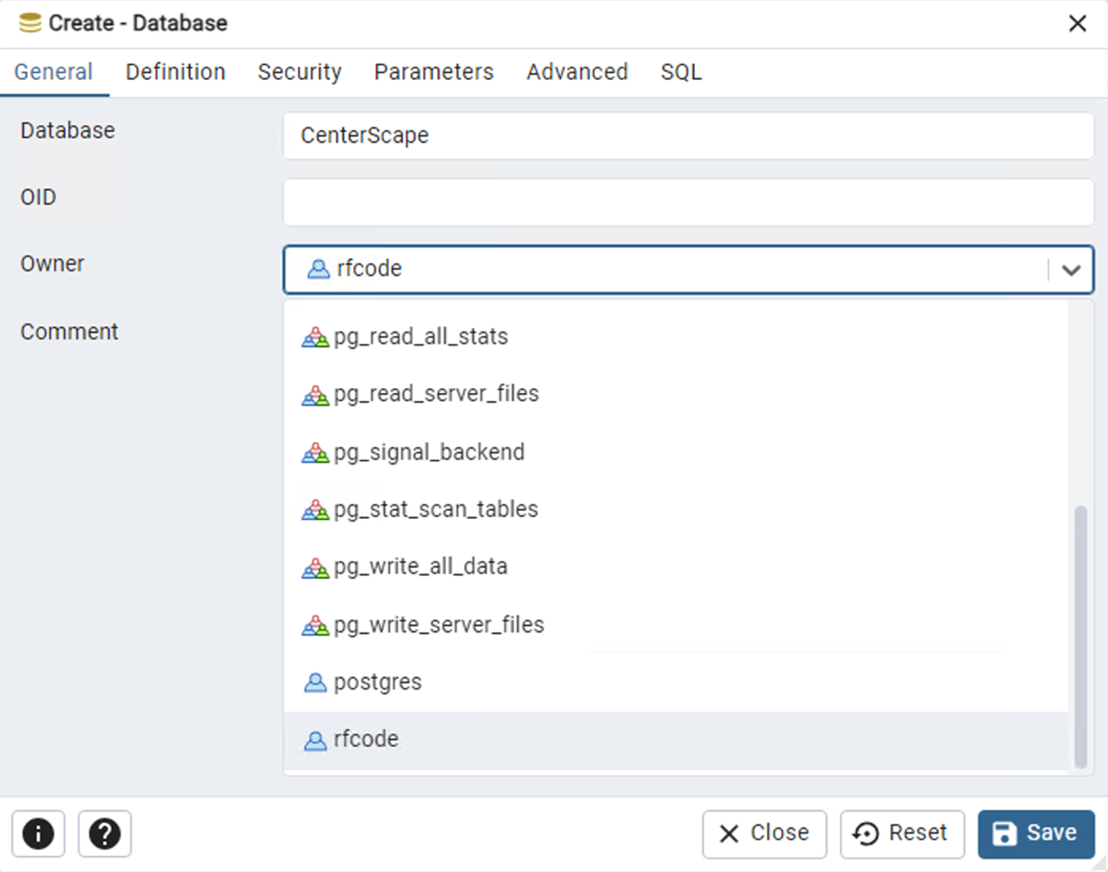
Save the Changes. Note: The configuration files postgresql.conf and pg_hba.conf may need to be modified to enable remote logins and to allocate memory and other resources to Postgres see postgresql.conf and pg_hba.conf sections in Linux install on this same page.
##Information Needed Later Before installing CenterScape, record the following database details:
- Database host name/IP address
- Port Number (for example 1433 for SQL)
- Database name
- Credentials to authenticate with the database